Tuesday, June 30, 2009

Scrapbooking Gal-Pals Album (8x8)

Doing one of these albums is soooo much fun. Here is what you do. You get an 8x8 or 6x6 album. Then you start snapping pics of your friends at the crops. When you print the pic, you give it to that friend and have her (or him) do their own page for your album. They will do it in their own style and colors. I usually give them a DCWV Mat Card Stack so they can choose their own color for the page.
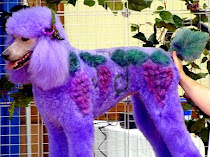
Scrapper Bee Deb is the page I did for my friend's Gal-Pals Album (8x8). A friend of mine at my regular crop had taken a picture of me with my altered ATG gun. She then gave it to me the following month and asked me to do my page. I looked through her Gal-Pals Album to get ideas of what everyone did and went to town. I had just gotten the Sizzix Bee Die Cut so it was so perfect!

After I did that page, I had to start my very own Gal-Pals Album. So here is the two-page (8x8) layout for my very own album. I have a scrapbooking gal-pals album... hooray! It is soooo much fun! Now if I can just start my 12x12 album I will be soooo happy. Anyway..... give it a try and start your own Scrapbooking Gal-Pals Album and see all your friends' different styles.


Sunday, June 28, 2009

Tool Belt Diva!

Love that show! I had a great mentor and was officially crowned a "tool belt diva" when I re-modeled (with my mentor's help) a wall with that ugly 70's rock on it. I took a sledge hammer to it, we put up new drywall, textured and painted it. What a difference it made! I finally got a great organizer for my tools. I loved this concept but of course had to "girl it up" a bit. It was so fun doing this and I get a lot of laughs when people see it. I took a regular canvas holder you get at Home Depot and glued and ironed and added all my Bling!

Saturday, June 27, 2009

Altered Letters by Debrabee!

This post is about my favorite altered and mixed media art that I have been doing since 2006. I can't find anyone that does these letters the way I do. They are one-of-a-kind and very unique. This pretty much is my signature piece of artwork that everyone knows I did it and I started it. They are very personalized to the person I give them to. I am posting several that I have given away as gifts both to ladies and gents and have done for others to give away as gifts.

Instructions on how to do these are simple, however, putting it all together can be very time consuming. I start out with the 9 inch white MDF letters from Michaels. I usually sand the edges a bit to give it a more rustic look. One of the first things I do before I even work on the letter, is make a list (or get a list from the giver of the gift) of the person's favorite things, their hobbies, family information (like kids, hubby, etc). Then I use my creativity to determine what I will put on the letter. If I am doing this for someone that is giving it as a gift, I am very clear on telling them I must have creative freedom on what I put on the letter as this comes as I create the letter and put it together. Once I have the list, I determine what colors I am going to use, the embellishments, paper, ribbon colors, etc. Depending on if it is for a man or a woman I use the appropriate amount of ribbons. For a man, I use much less, for a woman I use quite a lot. I then tear my paper pieces and place them on the letter.

Once I am satisfied with how it looks, I will glue it all down using stick glue. After the paper is down, then I start placing the embellishments, stickers, etc. to see how it will look. I will usually re-arrange everything several times until I get it perfect in my artistic eye. You may be wondering why I put paper down on the letter when I cover it all up with the embellishments, stickers, etc. I want other colors to show through rather than just the white of the letter. The paper on the base of the letter is really very little as it peeks through everything I put on top of the paper. I also think it makes a much more finished product this way. I have recently gone to printing pictures and then double and triple matting them. By using the logos and brands, you can get very personalized for the letter as you can't always find an embellishment or sticker with what you need to put on the letter. I use foam tape (pop dots) to give everything dimension when I put everything on the letters. Everyone that has ever received one of these letters absolutely loves them. I sometimes can spend 8 hours on one. It depends on how well I know the person and how much I want to fit on the letter. That is one reason I can't sell them as I would never cover the costs of my time and all that goes in to making them. I have also done this "M" as a memorial letter for someone who lost their husband to cancer. It had everything about him and their life together.
If you are not sure how to do something, please BEE-MAIL me and I will walk you through it with more detailed explanations and instructions. If you double-click on a picture it will take you into a separate screen and zoom the picture so you can see more of the details. Try one of these... you will love doing it but will love giving it that much more to someone!

Thursday, June 25, 2009

For the Love of Lilacs!

Lilacs always hold such a special place in my memory. Mom had a lilac bush in the backyard of our home growing up. I remember always going out there when they were in bloom and just embracing their wonderful sweet scent. To know that I will have that memory forever only heightens when I see a beautiful lilac bush. These pics are from a trip to Oregon in 2007 and I snapped away to my heart's content.

As I have written on another day, I have yet to start my own 12x12 album. However, as soon as I found Brenda Walton's (K and Company) Lilac collection I had to have it all for my own album. I bought the album, the paper, the cardstock, the vellum, the embellishments. I am ready to start using that beautiful collection for such beautiful life's moments!
May you enjoy these beautiful pictures of my favorite flower as I also pay tribute to my mom whom I miss every day. Until I see her again. I love you Mom.

Baby Girl Album Gift - Size (6x6)

When I was asked to do a card for a friend to give a family friend that just had a baby girl... I thought it needed more than just a card. So I went to work doing a small 6x6 album. It turned out so cute! I did not do the typical baby girl PINK album.
I used some brighter colors from my DCWV paper stacks.
I did all the wording on the computer using the Cheri font. It had that "girlie" flair. Here are the pics of that album. You can find the Cheri font at http://www.dafont.com/ and can download it for free. This site has awesome fonts for anything you need.

I took the metal posts out of the album and opted to use pretty ribbon instead. The book was too thick when I got it done so the ribbon gave it more flexibility to adjust the height that I couldn't get from the metal posts.

The only thing I wish I had done, was found a cute little box to put it in for presentation. You know those cute boxes you can find at Michael's. I thought of that after I gave it to my friend.
After I took these pics and sat and looked at it for awhile, I did add more ribbons to the tops of the pages so it looks a little more "ribbony". The back of the album has a pocket and a card as they were giving this with a gift card from a store. There are pages for all the pertinent information you have for a newborn baby as in Date, Time, Weight and Length. I did two two-page layouts for both sets of grandparents

and I left lots of mats and room for journalling and adding their own pics and special momentos from this special time.

I always think outside the box and don't always do the traditional patterns as would be expected. The thing I find about my love of scrapbooking as you can really go in a different direction in your creativity and produce something that is a one-of-a-kind creation.
You can try to duplicate this, but it will always have your own flair and style added to it. That is the best part of sharing the love of scrapbooking with others. If you are just getting started, start off with a small album. They are so much fun to do and can be less intimidating than a 12x12 album or layout pages.

Wednesday, June 24, 2009

It is all about the Bling!


Hi all! Just a little background on me if you are just coming to my blog... I was an avid rubber stamper for many years. Couldn't be bothered with all the buttons and bows of scrapbooking and that "stereotype".


Then I went to an all-night crop and I was "bit" by the scrapbooking bug. After that, I set my goal on obtaining all the things you need for scrapbooking... as much in purple, of course!


Then I found that scrapbooking opened up the creative box for me. Rubber stamping was fun and I did beautiful work but now I have so much more available to create. I have yet to do my very own 12x12 album for me. That is my goal this year.


I do love altered media the best. I will be posting projects that I have completed here and instructions on how to do them for all of you who want to learn. You can email me with any questions you may have. Thank you so much for reading my blog. God Bless!